Tree View Control Demonstration in VB.NET
Problem
Create a Windows Form Application program in Visual Basic.Net that will allow users to explore the Tree View Control in VB.NET.
Description
This tutorial will demonstrate the tree view control in VB.NET.
Before the tutorial the following are required to start:
- Microsoft Visual Studio 2008 – Above
The tutorial starts here:
- Open Microsoft Visual Studio 2012
- Select a New Project on the File menu.
- Select Visual Basic, Windows Form Application then click OK.
- We need to design our form by the following controls:
- 1 Tree View Control – tree view for the demonstration
- This is how it looks like
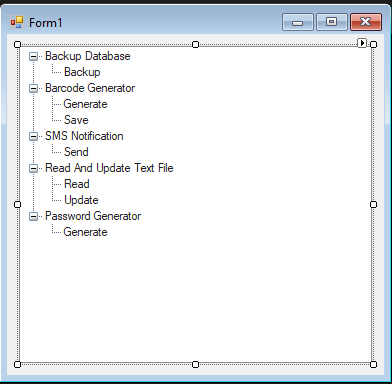
Figure 1. Design of the Form
- click the tree view control then click the small arrow on the top right corner of the control.

- Once the arrow is click, a window, the Tree Node Editor, will appear showing all your possible actions using the tree view control.
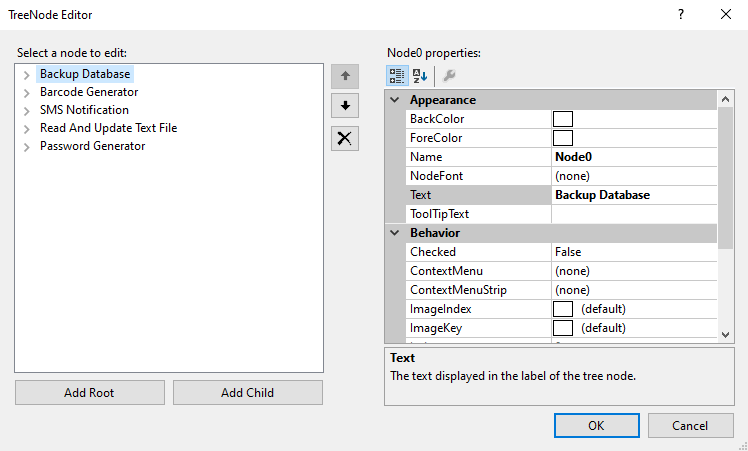
You can select a node from the tree view, then change its appearance and behaviors, you can add a child control from a node, change the text of a note and etc.
- In this example, let us create a tree view at runtime. Let’s double click on the Form and put the follow code in the opened window.
Public Class Form1
   Private Sub Form1_Load(sender As Object, e As EventArgs) Handles MyBase.Load
      Dim TreeView1 As TreeView
      TreeView1 = New TreeView()
      TreeView1.Location = New Point(10, 10)
      TreeView1.Size = New Size(150, 150)
      Me.Controls.Add(TreeView1)
      TreeView1.Nodes.Clear()
      'Creating the root node
      Dim root = New TreeNode("Application")
      TreeView1.Nodes.Add(root)
      TreeView1.Nodes(0).Nodes.Add(New TreeNode("Project 1"))
      'Creating child nodes under the first child
      For loopindex As Integer = 1 To 4
         TreeView1.Nodes(0).Nodes(0).Nodes.Add(New  _
            TreeNode("Sub Project" & Str(loopindex)))
      Next loopindex
      ' creating child nodes under the root
      TreeView1.Nodes(0).Nodes.Add(New TreeNode("Project 6"))
      'creating child nodes under the created child node
      For loopindex As Integer = 1 To 3
         TreeView1.Nodes(0).Nodes(1).Nodes.Add(New  _
            TreeNode("Project File" & Str(loopindex)))
      Next loopindex
      ' Set the caption bar text of the form.
      Me.Text = "Tree View Demo"
   End Sub
End Class
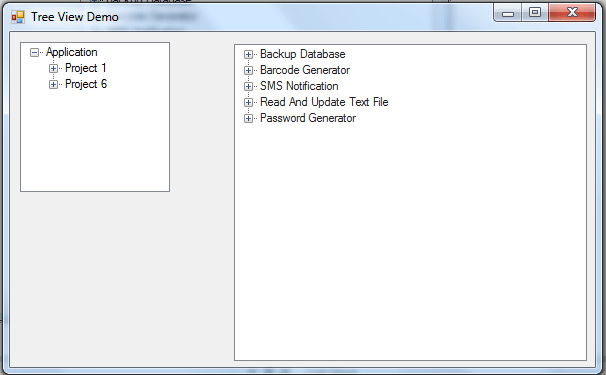
- When the above code is executed and run using Start button available at the Microsoft Visual Studio tool bar, it will show the following window – You can expand the nodes to see the child nodes −
Author:
Name: Charlie Devera
Email Address: charliedevera000@gmail.com
Free Download Source code (Tree View Control Demonstration in VB.NET)
You may visit our facebook page for more information, inquiries and comments.
Hire our team to do the project.