Barangay Management System Development Part 4 – Database Connection
Welcome to the part 4 of the tutorial on how to establish your own barangay management system in Visual Basic and MySQL. The focus of this tutorial is to provide you the guide on how to connect our Visual Basic program into our mysql database. This is very necessary in order to access our database, tables and establish queries in our mysql database.
The following tools are the requirements for us to be able to establish a connection into our database:
- mysql-connector-odbc-3.51.26
- XAMPP installer
We will give you the link on the mysql connector together with the visual basic files.
After we have installed the necessary tools, we will now proceed with our visual basic project.
Remember the previous part of our tutorial that explains what the components are needed to be included in our visual basic project? You can visit the previous tutorial here.
Next thing to do is to add a module into our visual basic program.
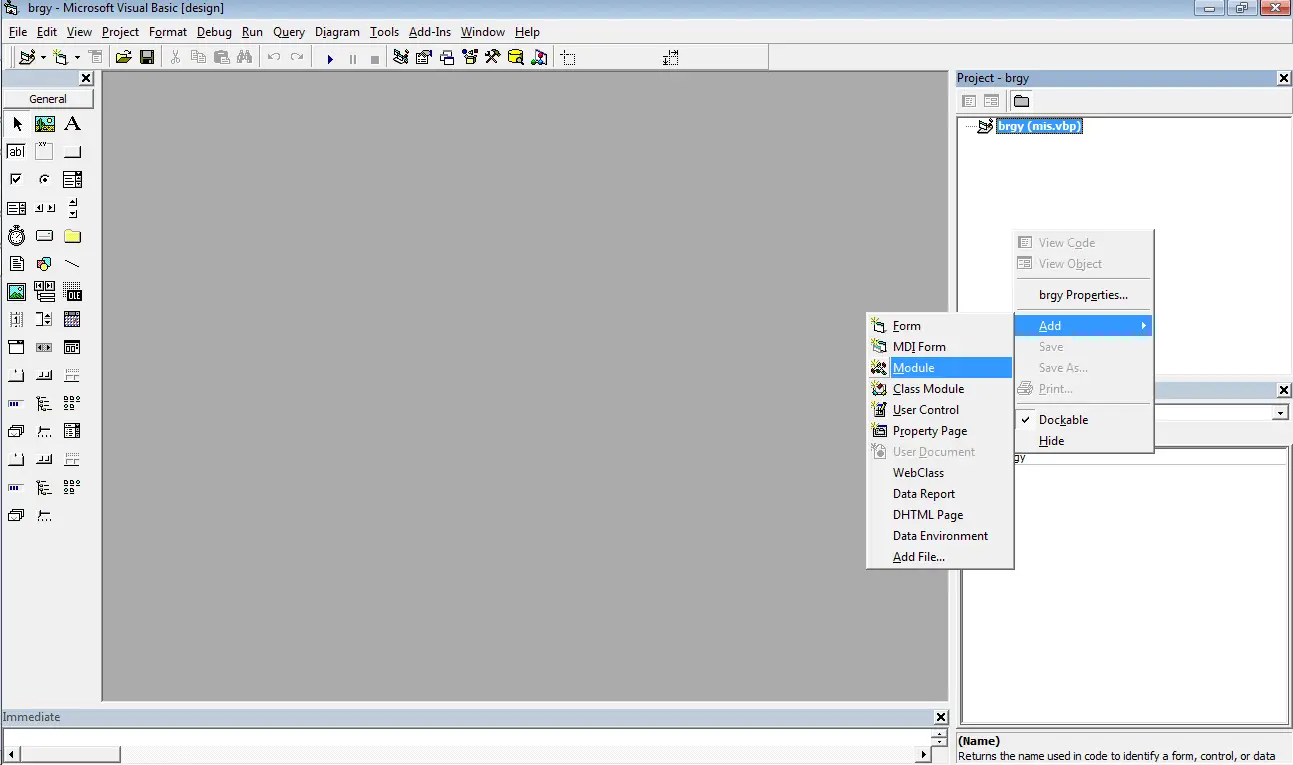
Rename and save the module into MySQL_Connection. After you have created the module, paste the code below.
Public conn As ADODB.Connection
Public rs As New ADODB.Recordset
Public db_name, db_server, db_port, db_user, db_pass, constr, serverip, curserver As String

Sub ConnServer()
On Error GoTo sourceerror:

'connect to MySQL server using MySQL ODBC 3.51 Driver
Set conn = New ADODB.Connection

'conn.Open
db_name = "barangaysysdba"
curserver = "localhost"
db_port = "3306"
db_user = "root"
db_pass = ""

constr = "Provider=MSDASQL.1;Password=;Persist Security Info=True;User ID=;Extended Properties=" & Chr(34) & "DRIVER={MySQL ODBC 3.51 Driver};DESC=;DATABASE=" & db_name & ";SERVER=" & curserver & ";UID=" & db_user & ";PASSWORD=" & db_pass & ";PORT=" & db_port & ";OPTION=16387;STMT=;" & Chr(34)
Set conn = New ADODB.Connection
conn.Open constr

If conn.State = adStateOpen Then
Exit Sub
Else
End If

sourceerror:

If Err.Number <> 0 Then
MsgBox "Err Number: " & Err.Number & vbNewLine & _
"Err Source: " & Err.Source & vbNewLine & _
"Err Description: " & Err.Description & vbNewLine _
, vbCritical + vbOKCancel, "ErrorException"
End If
End Sub
db_name = “barangaysysdb”
curserver = “localhost”
db_port = “3306”
db_user = “root”
db_pass = “”
Please double check the configuration the name of our database based on part 2 of our tutorial is barangaysysdb and since we are using xampp, the username used to access our database is root and there is no password, but for security purposes you must add a password in our mysql database. The password you have set in the mysql database will also be the value of the db_pass variable. The project can also be implemented in the local area network, if you will implement in that way, make sure that the value of the curserver refers to the ip address where the mysql server resides.
Next step is we need to check and test our code if it connects to our mysql database.
We need to create or add a form, Save it as Frm_Login. On the form load event, call the name of our database connection module. The code looks like:
Private Sub Form_Load()
ConnServer
End Sub
You need to set this form as the startup object of your project.
If the configuration is set properly, the form will open but if the configuration was not set properly an error message will display.
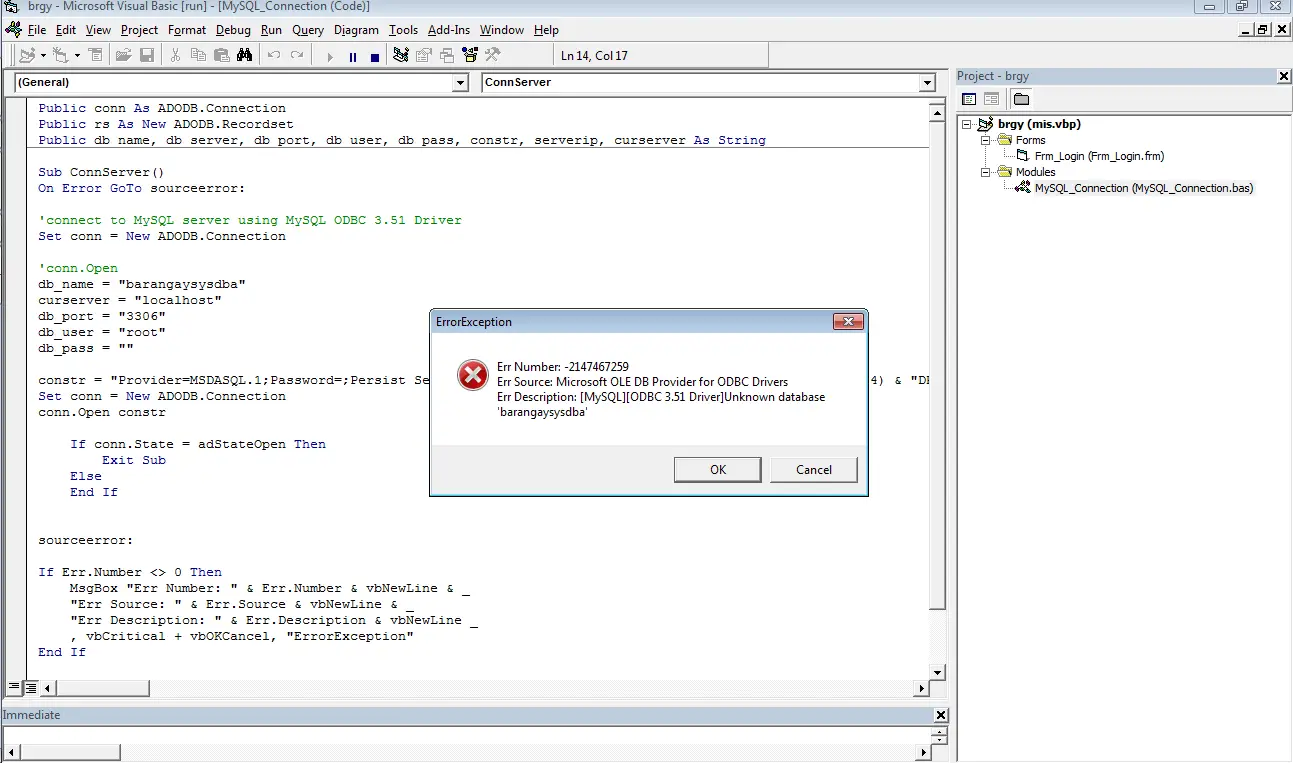
If you can encounter an error, you need to double check your configuration such as the name of the server, database name, username and password.
the next part of this tutorial is on how to create a login form that connects to our database.
You may also visit the following articles related to the barangay information system.
Barangay Records Management Features and User Interface
City Wide Barangay Management System in PHP and MySQL
see you on the part 4 of this free tutorial.
iNetTutor.com