How to add and remove item in Visual Basic 6 ListView Control
This tutorial will teach us how to add items and remove items from listview control.
Just follow the step by step procedures of this tutorial
1. Open your visual basic 6 program and create a new project and select Standard EXE.
2. Add a Form to our project and name it as ListviewFrm.
3. Save the Visual Basic project and the form in the same directory or folder.
4. We need the following controls:
Label – change the caption into Enter your name
TextBox – rename it to txtname
Two Command Button – Rename the first into cmdAdd and change the caption into Add Item and the second into cmdRemove with the caption Remove Item.
ListView – Rename it to lstViewDemo
Note: add first Microsoft Windows Common Controls 6.0 (SP6) component to include the listview control on our project.
5. Go to the Project in the menu bar and select Components and then look for Microsoft Windows Common Controls 6.0 (SP6) and check it.
The image below shows the controls added to our project. We can see this in the Toolbox of Visual Basic 6.

The highlighted one is the Listview control.
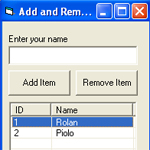
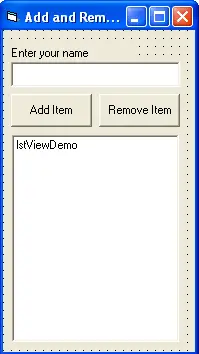
6. This is what your form should look like:
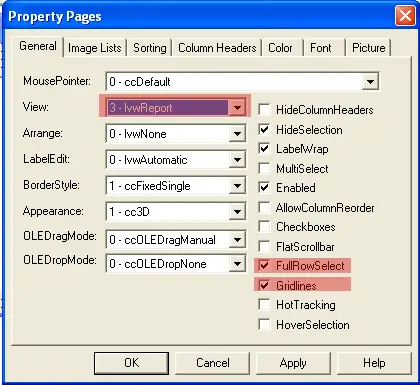
7. Right click the listview and select Properties. In the General Tab kindly set the View into lvwReport, check the FullRowSelect and Gridlines.
8. Next is we’re going to insert two columns in our listview control. In the Column Headers tab, click Insert Column. The first column is ID and second column is Name and then click OK.
9. Kindly open the ListviewFrm form. Double click the cmdAdd button and insert the following codes:
Dim lstItem As ListItem
If txtname.Text = "" Then
MsgBox "Please enter a name.", vbInformation, ""
txtname.SetFocus
Else
    Set lstItem = lstViewDemo.ListItems.Add(, , lstViewDemo.ListItems.Count + 1)
        lstItem.SubItems(1) = txtname.Text
        txtname.Text = ""
End If
The code above will add the value entered in the textbox to our listview control when the user clicks the cmdAdd button. You cannot add an item if you leave the textbox empty.
10. Next is the code that will remove the item from listview. Double click the cmdRemove button and paste the following codes:
If lstViewDemo.ListItems.Count <= 0 Then MsgBox "Nothing to remove", vbInformation, "": Exit Sub
        If vbYes = MsgBox("Are you sure you want to delete the selected item?", vbQuestion + vbYesNo, "") Then
            lstViewDemo.ListItems.Remove (lstViewDemo.SelectedItem.Index)
End If
The code above will first ask you if you really want to delete the item, if you select yes then the item will be removed from the list.
Note: you must first select which item you want to delete before you click the Remove Item button.
11. We are all set and ready to test the project, kindly press F5.
The source code is also available for download and you can use it as your reference.
If you encountered errors in the project don’t hesitate to contact us by posting your queries in the comment box or you can directly post you questions in our Facebook page.
Thank you and keep on visiting the site.