How to Enable/Disable Command Prompt
Command Prompt is a feature of Windows that provides an entry point for typing MS-DOS (Microsoft DiskOperating System) commands and other computer commands. The most important thing to know is thatby typing commands, you can perform tasks on your computer without using the Windows graphical interface.
In this tutorial, we will show you on how to enable/disable command prompt in different ways.
Solution 1:
We can enable/disable command prompt by typing this command in the Run dialog box.
REG add HKCU\Software\Policies\Microsoft\Windows\System /v DisableCMD /t REG_DWORD /d 0 /f
Note: 0 means enable, 1 will disable the command prompt.
Solution 2:
Modify the registry value.
- Open Registry Editor (Regedit.exe) and navigate to:
- [HKEY_CURRENT_USER\Software\Policies\Microsoft\Windows\System]
- In the right-pane, double-click DisableCMD and set its data to 0
Solution 3:
Using Group Policy Editor (gpedit.msc)
- Click Start, Run or use the keyboard shortcut (Window + R), and type gpedit.msc and click OK.
- Navigate to User Configuration \ Administrative Templates \ System
- Double-click the Prevent access to the command prompt setting.
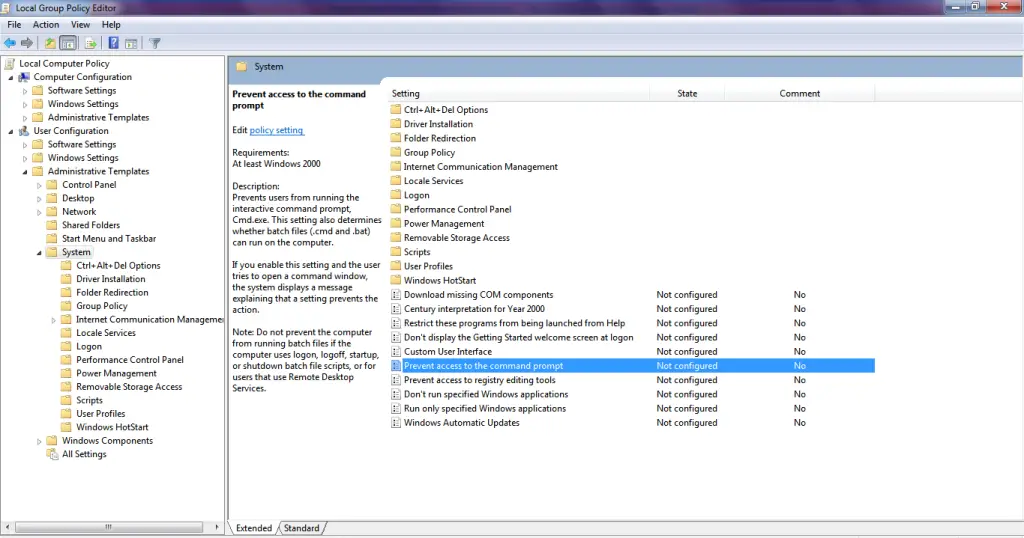
- You will be prompted by 3 options
- Not Configured – this will disable the setting, meaning command prompt is enabled.
- Enabled – this will prevent the user to use the command prompt.
- Disabled – same with Not Configured option, this will also allow the user to access the command prompt
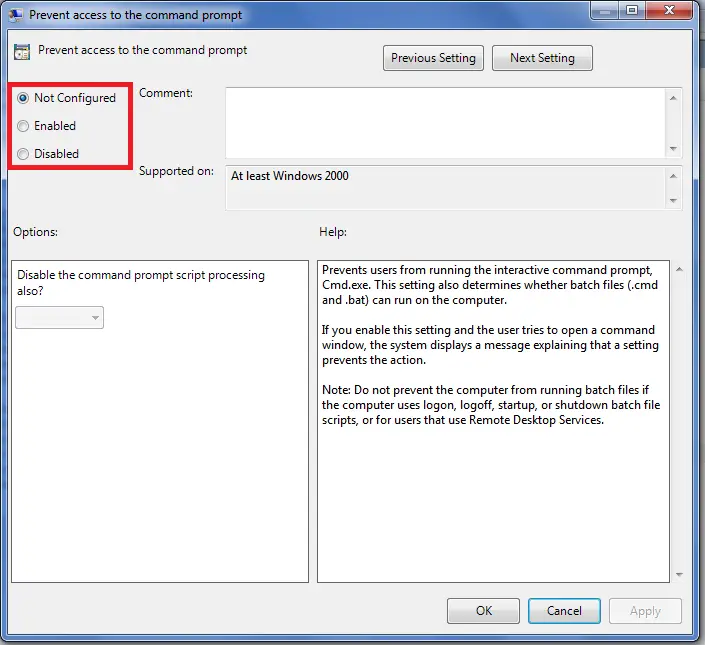
- Restart your computer.