Display Date and Time in Visual Basic 6
Hi everyone, welcome to another simple tutorial on visual basic 6. In this tutorial, we are going to learn how to display the current date and time in vb6.
This is a very easy tutorial and we don’t need additional components.
Here are the steps:
1. Kindly open your visual basic 6 program.
2. A dialog box will appear then select Standard Exe and click Open.
3. A new project has been created and a form as well. Rename the form into DateTimeFrm.
Note: a form in visual basic is an object and the name of an object is used in the code to identify the object.
4. We need a Timer and two Labels. Rename the first label into lblDate and the second one into lblTime. It’s up to you on how you are going to design your form. In our part, this is how we design it.
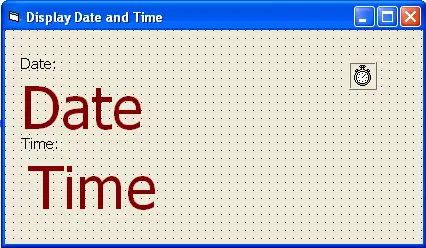
5. Set the interval property of the Timer into 100.
6. Double click the Timer control and add the code below. The code will get the time of your computer and that will be the caption of the lblTime during runtime.
lblTime.Caption = Time
7. After you have added the code, this is what it looks like.
Private Sub Timer1_Timer()
lblTime.Caption = Time
End Sub
8. Add the code below in the load event of the form or just simply double click the form. During runtime the caption of lblDate will be the date set on your computer.
lblDate.Caption = Date
9. To make sure that you have added the code correctly in the load event of the form, this is what it should be.
Private Sub Form_Load()
lblDate.Caption = Date
End Sub
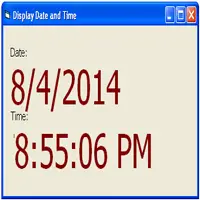
10. Press F5 to run the project.
You can download the source code for your reference.
Thank you for visiting inettutor.com.

I want to learn visual basic 6. pls help