How to Create Database for Employee Leave Management System
A lot of businesses cease to exist nowadays because they lack the proper technology. Most companies struggle with how to manage their human resources effectively and leave management is no exception. One mistake in the process and can cause a massive headache for your company.
In the workplace, an employee leave application system is a computer program used to keep track of employee absences and requests for time off. These solutions are particularly beneficial for larger organizations that may require employees to complete documentation on a one-to-one basis. This technique can help eliminate long lines or wait periods that would otherwise occur if employees were required to go to the HR or manager’s office every time they wanted time off from their jobs.
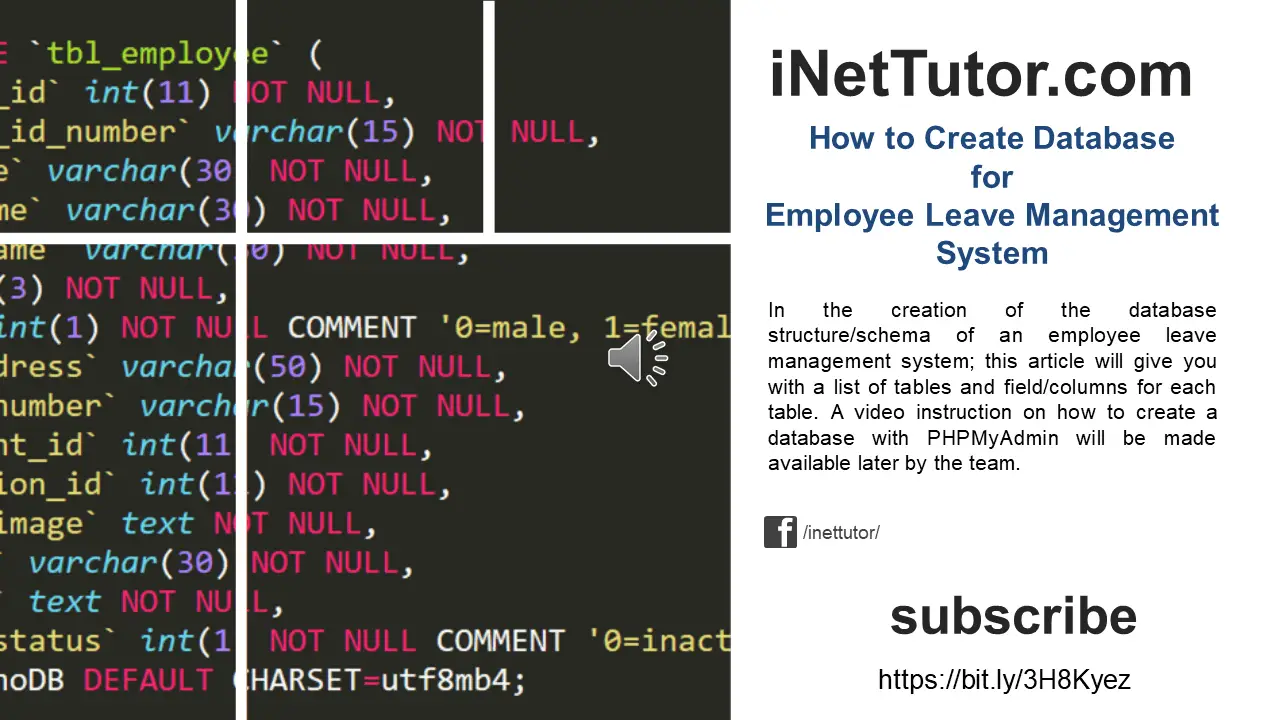
In the creation of the database structure/schema of an employee leave management system; this article will give you with a list of tables and field/columns for each table. A video instruction on how to create a database with PHPMyAdmin will be made available later by the team.
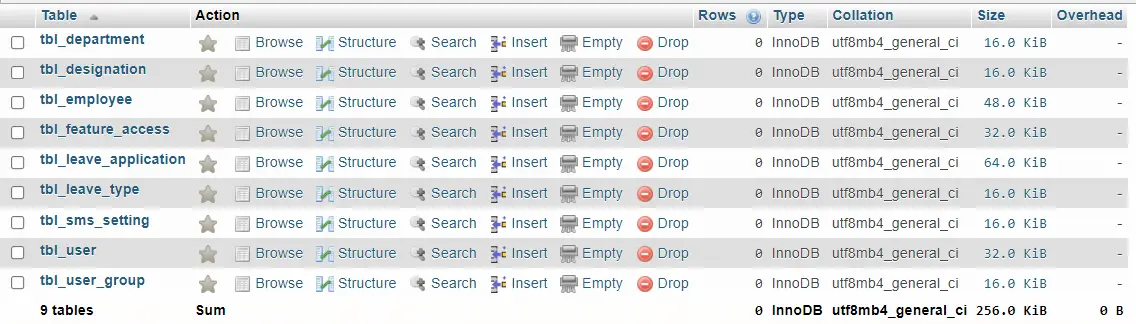
This database architecture comprises nine tables, each with its own set of fields and columns, as well as linkages between them.
tbl_department – this table of the project stores the information of the different departments of the organization or company. The department table has the following columns and fields:
- department_id – The table’s primary key is represented by this column. In most cases, it is set to auto increment (the database will automatically give this column a value starting from 1).
- department_shortname – The abbreviation or brief name of the office.
- department_name – This is the complete name with description of the office.
Create SQL Statement – the statement below is used to create the tbl_department, copy the sql statement and paste it in the sql manager/tab of your phpmyadmin.
CREATE TABLE `tbl_department` (
`department_id` int(11) NOT NULL,
`department_short_name` varchar(15) NOT NULL,
`department_name` varchar(100) NOT NULL
) ENGINE=InnoDB DEFAULT CHARSET=utf8mb4;
tbl_designation – designation refers to the work assignment of the employee and this is the table that stores the different job title of the organization or company. It has 3 columns and they are the following:
- designation_id – The table’s primary key. It’s commonly set to auto increment (the database will automatically give this column a value starting from 1).
- designation_name – It refers to the name of the job or job title.
- designation_description – This is the corresponding job description for the job title.
Create SQL Statement – the statement below is used to create the tbl_designation, copy the sql statement and paste it in the sql manager/tab of your phpmyadmin.
CREATE TABLE `tbl_designation` (
`designation_id` int(11) NOT NULL,
`designation_name` varchar(30) NOT NULL,
`designation_description` varchar(100) NOT NULL
) ENGINE=InnoDB DEFAULT CHARSET=utf8mb4;
tbl_employee – this table of the project is for the profile and personal information of the employees. The table contains 15 columns which includes the following:
- employee_id – the table’s primary key. Typically, it is set to automatically increase (the database will automatically give this column a value starting from 1).
- employee_id_number – the employee official number given by the company or organization.
- last_name – stores the last name of the employee.
- first_name – stores the first name of the employee.
- middle_name – stores the middle name of the employee.
- age
- gender
- email_address – the official email address will be provided and updated by organization.
- contact_number – mobile or phone number of the employee.
- department_id – this column is a foreign key that references to the department table.
- designation_id – this column is a foreign key that references to the designation table.
- profile_image – this is also known as the avatar.
- username – the desired username of the employee
- password – the desired username of the employee
- account_status – the admin or staff accounts can update the status into active and inactive.
Create SQL Statement – the statement below is used to create the tbl_employee, copy the sql statement and paste it in the sql manager/tab of your phpmyadmin.
CREATE TABLE `tbl_employee` (
`employee_id` int(11) NOT NULL,
`employee_id_number` varchar(15) NOT NULL,
`last_name` varchar(30) NOT NULL,
`first_name` varchar(30) NOT NULL,
`middle_name` varchar(30) NOT NULL,
`age` int(3) NOT NULL,
`gender` int(1) NOT NULL COMMENT '0=male, 1=female',
`email_address` varchar(50) NOT NULL,
`contact_number` varchar(15) NOT NULL,
`department_id` int(11) NOT NULL,
`designation_id` int(11) NOT NULL,
`profile_image` text NOT NULL,
`username` varchar(30) NOT NULL,
`password` text NOT NULL,
`account_status` int(1) NOT NULL COMMENT '0=inactive, 1=active'
) ENGINE=InnoDB DEFAULT CHARSET=utf8mb4;
tbl_leave_type – this table is all about the list of different leave type application allowed in the organization or company. The table has 4 columns or fields.
- leave_type_id – primary key of the table. It is set usually to auto_increment (the database will automatically give this column a value starting from 1).
- leave_name – leave type name
- leave_description – description and other information about the leave type.
- number_days_allowed – maximum number of days allowed for a certain leave type.
Create SQL Statement – the statement below is used to create the tbl_leave_type, copy the sql statement and paste it in the sql manager/tab of your phpmyadmin.
CREATE TABLE `tbl_leave_type` (
`leave_type_id` int(11) NOT NULL,
`leave_name` varchar(30) NOT NULL,
`leave_description` varchar(100) NOT NULL,
`number_days_allowed` int(3) NOT NULL
) ENGINE=InnoDB DEFAULT CHARSET=utf8mb4;
tbl_leave_application – This table is essential since it will store the leave application of the employees, which will be processed by the HR personnel later.
- application_id – this column serves as the primary key of the table.
- reference_number – this column is the control number generated by the system.
- employee_id – this column is a foreign key that references to the employee table.
- leave_type_id – this column is a foreign key that references to the leave type table.
- date_of_application – leave application date of the employee.
- attachment – requirements needed for the approval of the leave.
- leave_status – this column contains a value of 0 for pending, 1 for approve, and 2 for rejected.
- remarks – message or comments about the leave application.
- date_of_approval – the approval date of the leave application.
- user_id – processing officer
Create SQL Statement – the statement below is used to create the tbl_leave_application, copy the sql statement and paste it in the sql manager/tab of your phpmyadmin.
CREATE TABLE `tbl_leave_application` (
`application_id` int(11) NOT NULL,
`reference_number` varchar(30) NOT NULL,
`employee_id` int(11) NOT NULL,
`leave_type_id` int(11) NOT NULL,
`date_of_application` date NOT NULL,
`attachment` text NOT NULL,
`leave_status` int(11) NOT NULL COMMENT '0 for pending, 1 for approve, and 2 for rejected',
`remarks` varchar(100) NOT NULL,
`date_of_approval` date NOT NULL,
`user_id` int(11) NOT NULL
) ENGINE=InnoDB DEFAULT CHARSET=utf8mb4;
tbl_sms_setting – this table is for the API account of the iTexMo SMS API.
- api_code – the code provided by iTexMo SMS API.
- api_password – the password provided by iTexMo SMS API.
- status – the user can set the api into on or off (enable or disable).
Create SQL Statement – the statement below is used to create the tbl_sms_setting, copy the sql statement and paste it in the sql manager/tab of your phpmyadmin.
CREATE TABLE `tbl_sms_setting` (
`api_code` varchar(50) NOT NULL,
`api_password` varchar(50) NOT NULL,
`status` int(1) NOT NULL COMMENT '0=enable, 1=disable'
) ENGINE=InnoDB DEFAULT CHARSET=utf8mb4;
tbl_user – this table will store the information of personnel who can access the records of the system.
- user_id – primary key of the table. It is set usually to auto_increment (the database will automatically give this column a value starting from 1).
- username – username of the personnel used to login together with the password.
- password – password of the personnel used to login together with the username.
- avatar – this will hold the profile image of the user.
- fullname – the complete name of the personnel or user.
- contact – contact number of the personnel (mobile/cellphone number).
- email – email address of the personnel/user.
- user_category_id – the user group or category of the user.
- status – the value of this column is 0 or 1, 0 means deactivated or inactive, 1 is activated or active.
Create SQL Statement – the statement below is used to create the tbl_user, copy the sql statement and paste it in the sql manager/tab of your phpmyadmin.
CREATE TABLE `tbl_user` (
`user_id` int(11) NOT NULL,
`username` varchar(30) NOT NULL,
`password` text NOT NULL,
`avatar` text NOT NULL COMMENT 'you can also use blob',
`fullname` varchar(100) NOT NULL,
`contact` varchar(15) NOT NULL,
`email` varchar(50) NOT NULL,
`user_category_id` int(11) NOT NULL,
`status` int(1) NOT NULL COMMENT '0=active, 1=inactive'
) ENGINE=InnoDB DEFAULT CHARSET=utf8mb4;
tbl_user_group – this table store the information of the user group which includes the functions they can and can’t access in the system.
- user_group_id – primary key of the table. It is set usually to auto_increment (the database will automatically give this column a value starting from 1).
- group_name – name of the category or user group.
- description – information on what the user group is all about.
- allow_add – this column is to allow or prevent user from adding a record.
- allow_edit – this column is to allow or prevent user from editing or updating a record.
- allow_delete – this column is to allow or prevent user from removing or deleting a record.
- allow_print – this column is to allow or prevent user from printing a report.
- allow_import – this column is to allow or prevent user from importing records to the system.
- allow_export – this column is to allow or prevent user from exporting records from the system.
Create SQL Statement – the statement below is used to create the tbl_user_group, copy the sql statement and paste it in the sql manager/tab of your phpmyadmin.
CREATE TABLE `tbl_user_group` (
`user_group_id` int(11) NOT NULL,
`group_name` varchar(30) NOT NULL,
`description` varchar(100) NOT NULL,
`allow_add` int(1) NOT NULL COMMENT '0=can''t access 1=can access',
`allow_edit` int(1) NOT NULL COMMENT '0=can''t access 1=can access',
`allow_delete` int(1) NOT NULL COMMENT '0=can''t access 1=can access',
`allow_print` int(1) NOT NULL COMMENT '0=can''t access 1=can access',
`allow_import` int(1) NOT NULL COMMENT '0=can''t access 1=can access',
`allow_export` int(1) NOT NULL COMMENT '0=can''t access 1=can access'
) ENGINE=InnoDB DEFAULT CHARSET=utf8mb4;
tbl_feature_access – this table is for the access control of the users in terms of system modules.
- access_id – primary key of the table.
- user_id – foreign key that links to the user table.
- access_department – 0 means the user can’t access this module and 1 for allowing the user to access the module.
- access_designation 0 means the user can’t access this designation module and 1 for allowing the user to access the designation records..
- access_employee – 0 means the user can’t access this employee records and 1 for allowing the user to access the employee module.
- access_leave_type – 0 signifies that the user cannot access this module, while 1 means that the user can.
- access_leave_application – A value of 0 indicates that the user is unable to access this module, whereas a value of 1 indicates that the user is permitted to do so.
- access_sms – 0 indicates that the user is not permitted to access this module, whereas 1 indicates that the user is permitted to access the module.
- access_users – 0 signifies the user can’t access the module and 1 means they can.
Create SQL Statement – the statement below is used to create the tbl_feature_access, copy the sql statement and paste it in the sql manager/tab of your phpmyadmin.
CREATE TABLE `tbl_feature_access` (
`access_id` int(11) NOT NULL,
`user_id` int(11) NOT NULL,
`access_department` int(1) NOT NULL,
`access_designation` int(1) NOT NULL,
`access_employee` int(1) NOT NULL,
`access_leave_type` int(1) NOT NULL,
`access_leave_application` int(1) NOT NULL,
`access_sms` int(1) NOT NULL,
`access_users` int(1) NOT NULL
) ENGINE=InnoDB DEFAULT CHARSET=utf8mb4;
Summary
An Employee Leave Management System is highly recommended because it ensures that employees’ leave is successfully managed while also preserving records of it in a secure electronic format.
This article only focuses on the design of the database, which includes the tables and their fields or columns. It is the first step in developing the said project, and after the preparation of the storage part of the system, the next phase is to design the user interface. You may visit the blog post on the user interface design of the employee leave management system.
Free Employee Leave Management System
video tutorial: How to Create Database for Employee Leave Management System – Video
You may visit our Facebook page for more information, inquiries, and comments. Please subscribe also to our Youtube Channel to receive free capstone projects resources and computer programming tutorials.
Hire our team to do the project.