Activity Attendance System using Biometrics Fingerprint Scanner
General Objectives
The main objective of this study is to develop an operational SUPREME STUDENT COUNCIL (SSC) STUDENTS ACTIVITY ATTENDANCE AND MONITORING SYSTEM using BIOMETRICS specifically it aims:
- Easily and fast tracking of student’s attendance in every activity.
- To minimize time consumption of finding attendance in a sheet of paper.
- To minimize time consumption in signing of students activity card.
- To provide a graph to monitor the most attending department in every school activities.
- To secure the students attendance in every school activities.
Database Schema
tblStudent (id, idnumber, fullname, contact, address, year, course)
tblCourse (id, coursename, coursedescription)
tblActivity (id, activityname, description, date, banner, course, numberofswipe)
tblUser (id, accountname, password, category(admin,checker))
tblAttendance (id, studentid, courseid, activityid,swipetime, status(inAM, outAM, inPM, outPM))
tblFine (id, fineamount, dateupdated)
Scope and Limitation
The system will be able to:
- Add, update student information.
- Add, update and remove courses record.
- Add, update and remove activities record.
- Display a graph and count the most attending course in every year level and print the result.
- Display the result in every activity to secure the students attendance and print the result.
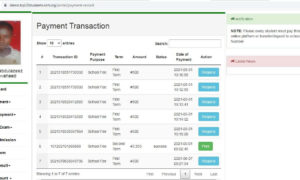
- Compute the fine of students and provide a receipt
Manual of Operation
Activity Attendance System using Biometrics Fingerprint Scanner
Different areas and navigation of the system
Home Screen

Main Menu
Contains menus to perform basic operation like add, edit, delete, cancel, search that enables user to manipulate data over the form.
By default, the Entry Fields are disabled to prevent adding unrelated data to the database.
Shortcuts – Add (F2), Edit (F3), Delete (F4), Save (F9), Cancel (F6), Search (CTRL+F)
Adding Data
To add data to the form, press the Add Button and you will notice that the Entry fields will be enabled allowing you to input some information. Enter a valid information and press the Save Button to save the data. You can also press the Cancel Button to cancel your current transaction or press the Search Button to search for existing records.
Some of the entry fields may contain entry fields similar to ID Number, when you encounter this type of form, just press the button to select the required input.
Editing & Deleting Records
To edit record, click on the Entry tab and select the item you want to edit from the list. After click the desired item, the EDIT and Delete button will be enabled. If you want to edit, press the Edit. After you have made modification to the record, press the Save button to complete the edit. To delete a record, select the Entry from the list and press delete. You will be prompted to continue to delete the record. Press yes to continue and confirm to delete the record.
After which you become familiar with the manipulation of the form, it’s now time to start the actual operation of the system.
Login
Start the system, you see a splash screen allowing the system to load the required resources. You will be redirected to the Login Screen which ask for the username and password of the registered user.
Enter the username and password you have registered and press Login to login to the system.
Note: The default username is admin and password is password, you may change the default user after you have login to the system. A success login will redirect you to the home screen similar to the screen in page 1 of this manual.
Manage Accounts
The manage account section allows you to add several users of the system with their corresponding privileges.
The account type admin is the superuser of the system obtaining all the permissions to perform administrative functions. On the other hand, the checker has lesser privilege allowing only limited part of the system. You may add several users as you want, please refer to page number 1 on how to add, edit, delete records.
Manage Students
You can find manage student in Main Menu. Click the menu to open up the manage student form.
Add the required information of the student by filling up the entry form and press the save button when done. The list of the Students registered in the system can be found in the LIST Tab. You may also use the search functionality of the system to search for student and edit or delete their records.
Profile Picture
After adding the student’s record above, you can choose to upload their profile picture. This is essential if you want to see their Picture when they Login or Out in the Biometric System Later on.
To upload a profile picture, first select the name of student you want to add a picture. After selecting the student, you can double click the box and select the image from your computer and press the Save button to save the profile picture. You may also click the preview button to get image from your webcam if available. If you choose to select image from your webcam, firstly connect you webcam and press preview. You will see in the box the live preview of your webcam, press Capture button to capture the image the then press Save to save.
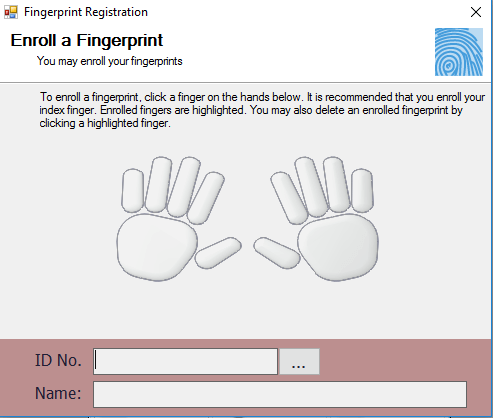
Registering Fingerprints
To register a fingerprint, navigate to home screen->Register Fingerprint menu and the Fingerprint registration will open.
To register the fingerprint, you need to firstly connect the u.are.u 4500 digital persona fingerprint reader in your computer. You may also need to install the required SDK for the reader to be detected in your computer.
Select the name of the student you want to register in the search button and selecting the name of the student from the list similar to the image below.
Select the name of the student, you may also use the search box to quickly search for the name of the student. Double Click on the selected student to add him/her to the registration queue.
After adding the student, click on the finger you want to register and start scanning his/her fingerprint.
Place his/her finger in the scanner and the system will detect samples of his fingerprint. Scan the same finger until the system says “Registration is Successful”.
Manage Events
Events specified in this system are the events that your school is going to have. Go to manage event menu in the Main menu and click to enter some of your desired events.
Enter the required information (Ex. Event code: Bwika, Event Name: Buwan ng Wika) in the entry fields. The start time and end time should be in required format (Ex. 7:00 AM and 4:00 PM). You may also input the date of the said activity and the course that will be having this activity. Please don’t delete the ALL course as this is the general to all courses. If you are having events for all courses, select all in the course to involve all the courses in the activity.
Manage Courses
The manage course menu is for you to add courses in your school.
The ALL – Universal Course is the course code which refers to all the courses. This is essential if you are having activity for all courses. Add the available courses in your school in this form so that you can organize activity per courses.
Manage Penalty
This can be located in the Main Menu of the system. Here you can specify the amount which corresponds to certain late, tardiness or under time as penalty.
Students Attendance
By navigating to main menu->student’s attendance you will be able to generate individual summary of attendance as shown in the image below.
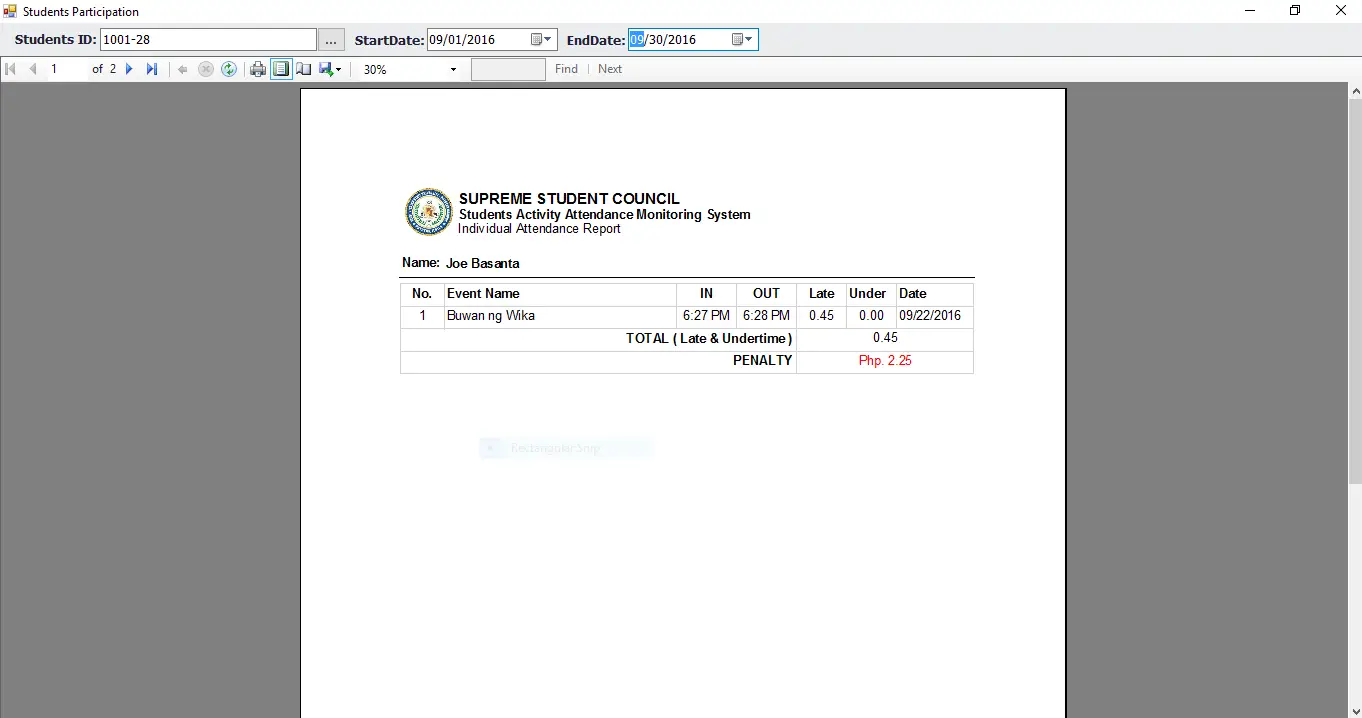
In this form, provide the Students ID, start date and end date in order to get the students attendance in the date range you specified.
Participation Summary
By navigating to main menu->participation summary, you can generate reports of the students who participated in an event.
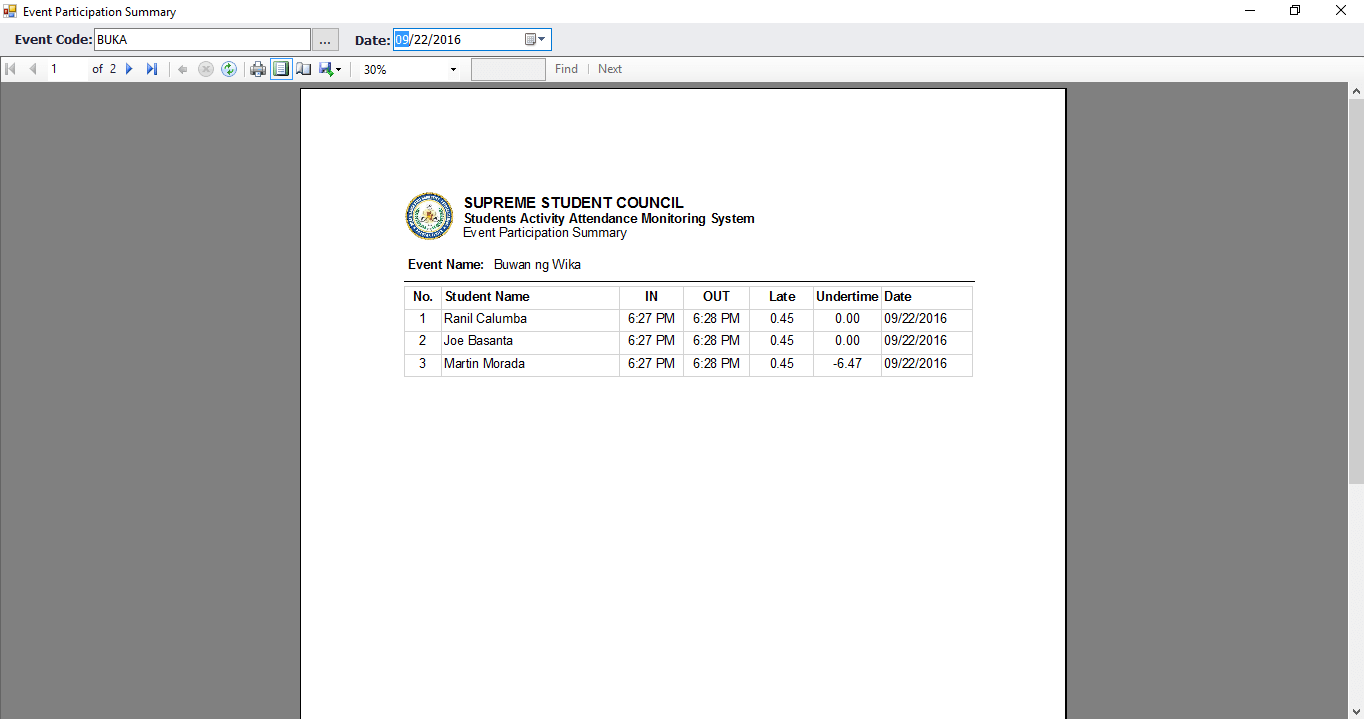
In this form, select the Event you want to view the participation report and the date when the activity is held.
Event Summary
By navigating to main menu->event summary, you can generate reports of activities held in a particular year.
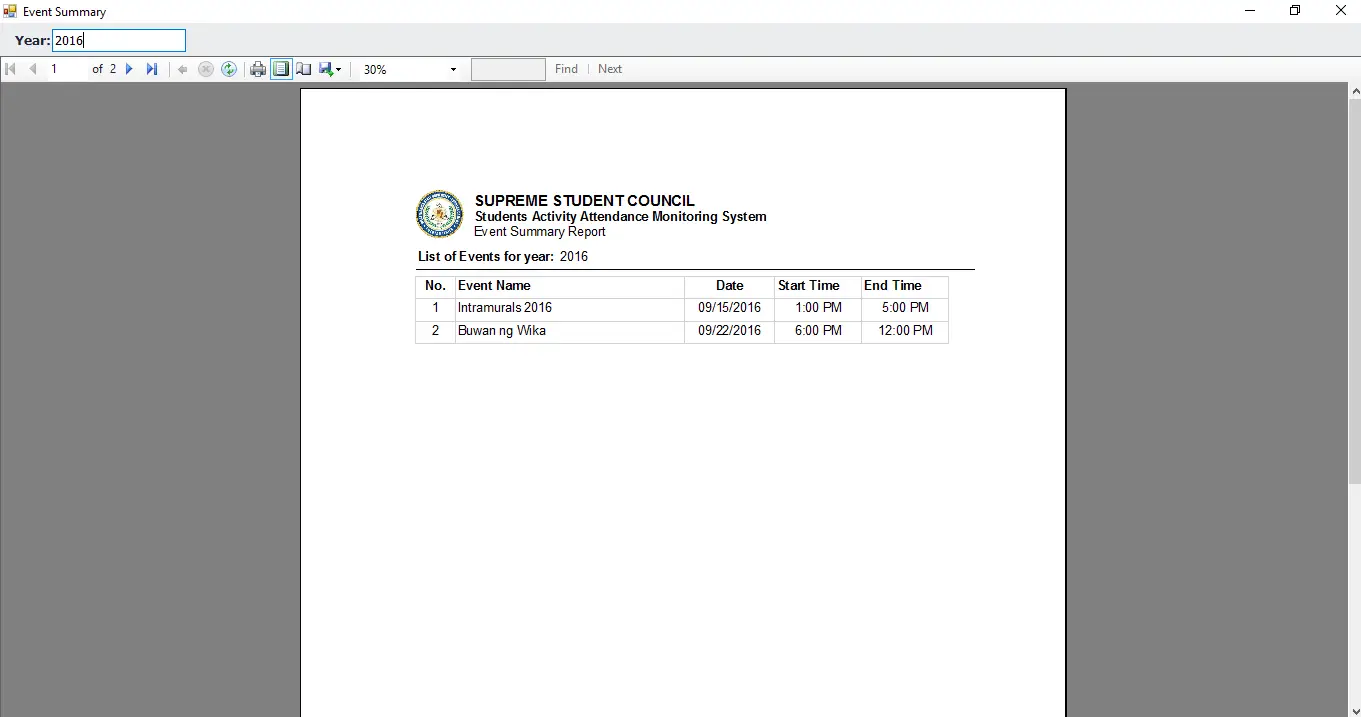
In this form, enter the year you want to view the summary of event to generate the report.
Statistical Comparison
In order to compare the number of participants in an event by year, navigate to main menu->statistical comparison.
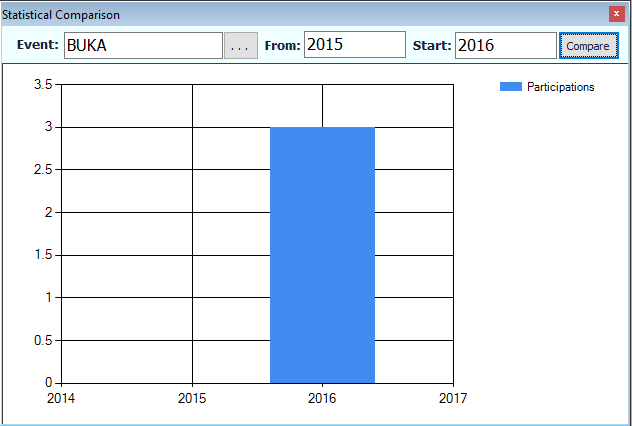
In this form, select the event name, enter the start year and the end year and the system will compare the participation of students.
Backup Database
In order to obtain backup of the system in case of data loss, navigate to main menu->Backup Database.
Select the location where you want to store the backup and press save. The system will generate an encrypted backup of your database which you can keep and store in different place for security. Wait for the system to notify you that the backup is complete.
Restore Database
This functionality allows you to restore your backup in the system. Navigate to main menu->restore database.
Select the location where you backup is stored and press open. Wait for the system to notify you that the restoration is complete.
Logout
To logout just close the system by clicking the close button that the upper right corner of your window.
DTR Manual
The DTR is separate system which can be installed on different terminals in your school and can be connected to the server through network.
Open this during activity and connect your fingerprint reader. Once activity is detected, it will show the code and the name of activity that is held and begin the attendance recording.

Note: The system will not allow you to take attendance when no event is scheduled in that day to avoid polluting the database record.
To prompt student to timein, press the I key in your keyboard and the IN badge will turn red. You can now start capturing the attendance.
To prompt student to timeout, press the O key in your keyboard and the OUT badge will turn red. You can now start capturing the attendance.
To quit the system, just press escape in the keyboard.